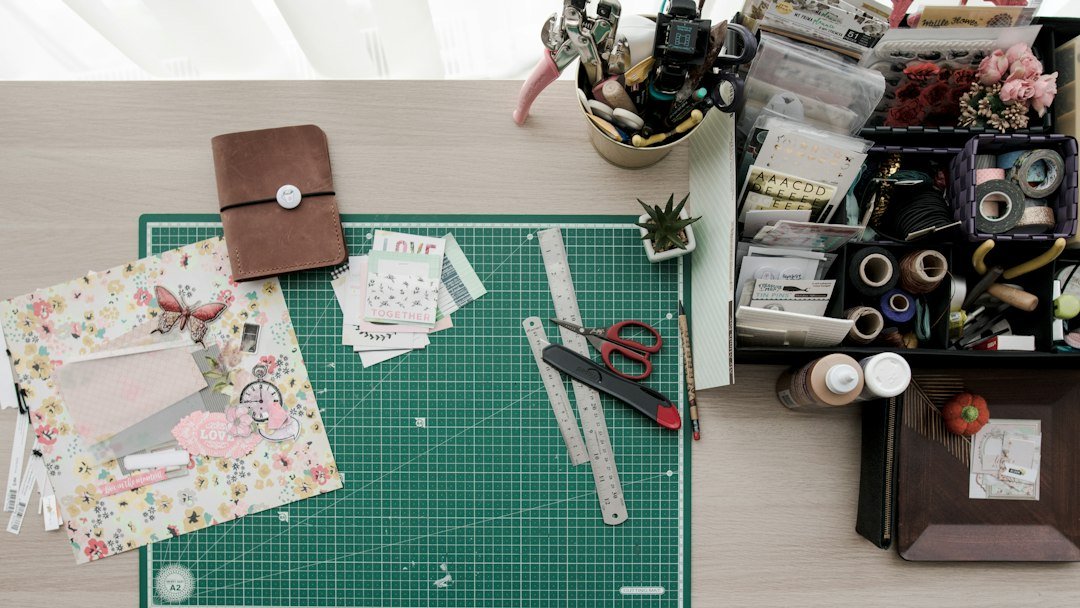
When your apartment craft corner looks like a jumbled drawer
You know the scene: scissors buried under fabric, glue sticks rolled behind paint bottles, and a half-finished project abandoned because you can’t find the right bead. The goal is simple: make supplies visible, reachable and sorted so projects move forward without a scavenger hunt. Below is a practical plan to organize craft supplies in a small space so your tools live where you work and every inch earns its keep.
What success looks like
Imagine a compact workspace where: daily tools sit on or next to your table, specialty supplies are in labeled bins or drawers, vertical walls hold commonly used items, and a small rolling cart or stackable system contains overflow. That combination keeps your main surface clear and makes starting and cleaning up fast.
Sort first: keep, donate, stash, toss
Before buying holders, do a quick audit. Pull everything into one pile and make four piles: keep (used in the last 6–12 months), donate/sell (still good but rarely used), stash (seasonal or project-specific), toss (broken, dried-up or unusable). Be strict—small spaces punish hoarding.
Zone your space by how you use it
Create functional zones: a work surface, a tool zone (scissors, rulers, cutters), a consumables zone (glue, paints, threads), and a project zone (current projects). Place the work surface in the best-lit spot; keep tool and consumable zones within arm’s reach and project storage slightly farther away.
Choose storage types that fit the items and the space
- Clear stackable drawers: Best for small items—beads, sequins, stickers. They stack vertically to save floor space and make contents visible.
- Desktop organizers: For brushes, pens and scissors you grab all the time; choose a narrow organizer if your desk is small.
- Pegboard or wall rails: Use vertical wall space for scissors, rulers, tape and ribbon spools on dowels. It keeps tools visible and off the table.
- Rolling cart: A narrow 3–4 drawer cart fits beside a table and can tuck under when not used; ideal for overflow and portable projects.
- Flat file or magazine holders: Store cardstock, pattern sheets and cutting mats upright to prevent warping and to save horizontal space.
- Small clear jars and labeled bins: Group similar consumables (buttons, pins, needles) in jars so you can see contents and keep them dust-free.
Organize by frequency and format
Place the things you use daily within arm’s reach; weekly or monthly items can live higher, lower or in a cart. Also match container size to supply frequency: narrow vertical trays for paintbrushes, shallow drawers for stickers, deep drawers for fabric scraps. This reduces wasted space and frustration.
Make small spaces feel larger with a layered approach
Layer storage: A slim caddy on the table, pegboard above it, and slim rolling drawers beside or under the table. This allows horizontal surface to stay mostly clear while stacking utility vertically. Use the table edge: attach a small hanging caddy or clamps for cutting mats to keep the top usable.
Labeling and sight-lines: the small-space superpower
Label every drawer and bin. In tight quarters you rely on quick scans, not memory. Use simple labels—printed or write-on masking tape—and include a brief contents list (e.g., “beads: blue/green, small”). For clear drawers, a label on the side keeps the front uncluttered and readable from a standing angle.
One product that solves many small-space problems
For a compact, flexible solution that suits many craft setups, a small stackable drawer organizer is a top choice: it stores small items in visible drawers, stacks vertically, and fits under or beside a worktable.
Keep projects moving with portable project kits
Designate a small tote or shallow drawer as a “current project” kit. Everything needed for that project goes in—fabric/paper, thread, tools—so you can pause and resume without reorganizing. When finished, return unused items to their permanent homes to avoid drift.
Troubleshooting common small-space problems
- Too many tiny items: Use egg-crate style trays or small divided compartments in shallow drawers—group by function and color.
- Supplies pile up on the table: Implement a 5-minute nightly tidy where you return three items to their bins; the habit prevents avalanche.
- Not enough lighting: Clip-on lamps or LED strips under shelves concentrate light without eating floor space.
- Fabric or paper wrinkling: Store them upright in magazine holders or flat files; avoid loose piles on chairs.
When to upgrade or simplify
If you consistently find you don’t use items in a zone, move them out—either donated or stored elsewhere. Conversely, if you outgrow a drawer every few months, consider a slim rolling cart or wall shelving. The trick is to match container scale to your steady-state volume, not temporary spikes.
- Sort supplies into keep, donate, stash, toss piles.
- Assign a work surface, tool zone, consumable zone and project zone.
- Choose stackable drawers or a slim rolling cart for overflow.
- Install a pegboard or rail for scissors, rulers and ribbon spools.
- Label drawers and bins for quick scanning.
- Create a portable project kit to avoid tabletop clutter.
Organize craft supplies in a small space by auditing what you own, zoning by use, and selecting vertical, visible storage (stackable drawers, pegboard, slim carts). Keep daily items at arm’s reach and use a project kit to stay productive.
What is the best storage for tiny craft supplies like beads or sequins?
Clear stackable drawers or small divided containers in shallow drawers work best; they keep pieces visible and prevent mixing while saving space.
Can I use pegboard in a rented apartment?
Yes—use freestanding pegboard panels, tension-rod-mounted rails, or adhesive-backed pegboard strips to avoid permanent holes.
How do I stop supplies from spilling when I move my craft area?
Store loose items in lidded bins or small jars, and use a tote or lidded box for in-progress projects to keep components together.
What should be kept on the desktop vs. in drawers?
Keep tools you grab every session (scissors, pens, glue) on the desktop or in a narrow caddy; keep bulk consumables and infrequently used specialty tools in drawers or higher shelves.
How often should I declutter craft supplies?
Do a quick purge every 3–6 months and a deeper audit annually to prevent accumulation in small spaces.